
Making Forever Wreaths

I recently taught wreath-making classes in Grants Pass and Jacksonville, OR and realized that it might be helpful to walk you through wreath-making here as well. Seasonal wreaths can be comprised of many types of material—farm-grown and dried everlasting flowers, garden seed-pods, and locally-foraged greenery are just a few things that come to mind. The possibilities are really as varied as your imagination allows.
When the weather cools, it’s nice to bring the garden inside and we have such a strong tradition of Holiday Wreaths in the U.S. Most people rely principally on evergreens and cones for holiday wreaths, but since there’s a fair bit of effort that goes into making a wreath, I like my wreaths to last a bit longer than just the month of December. So, often, I choose colorful dried flowers and seed pods exclusively, or if I want to give my wreath more of a “holiday feel”, I’ll include locally-foraged evergreens like Incense Cedar, Manzanita, Mistletoe, or Usnea (Old Man’s Beard Lichen). The wreath directions I give below are for a wreath made of predominately dried materials. Wreaths made from fresh materials should be attached to a reinforced base to hold the additional weight, but all techniques for attaching materials can be adapted to crafting wreaths from fresh materials.
Materials you’ll need beyond dried plants are: baling wire, 22 or 24 gauge green floral wire, wire snips, floral snips.

Step 1: Form a wreath base
Pre-made wreath bases can be purchased at craft stores but a lower-cost material to use is baling wire, which can be obtained at any hardware store for less than $10 per roll. One roll will make scores of wreath frames and is a pretty handy material to have around for other uses. Open the roll, determine the diameter of the wreath you’d like to make, and unwind enough wire to create a circle and wrap the circle around itself 2-3 times.
Step 2: Prep your materials
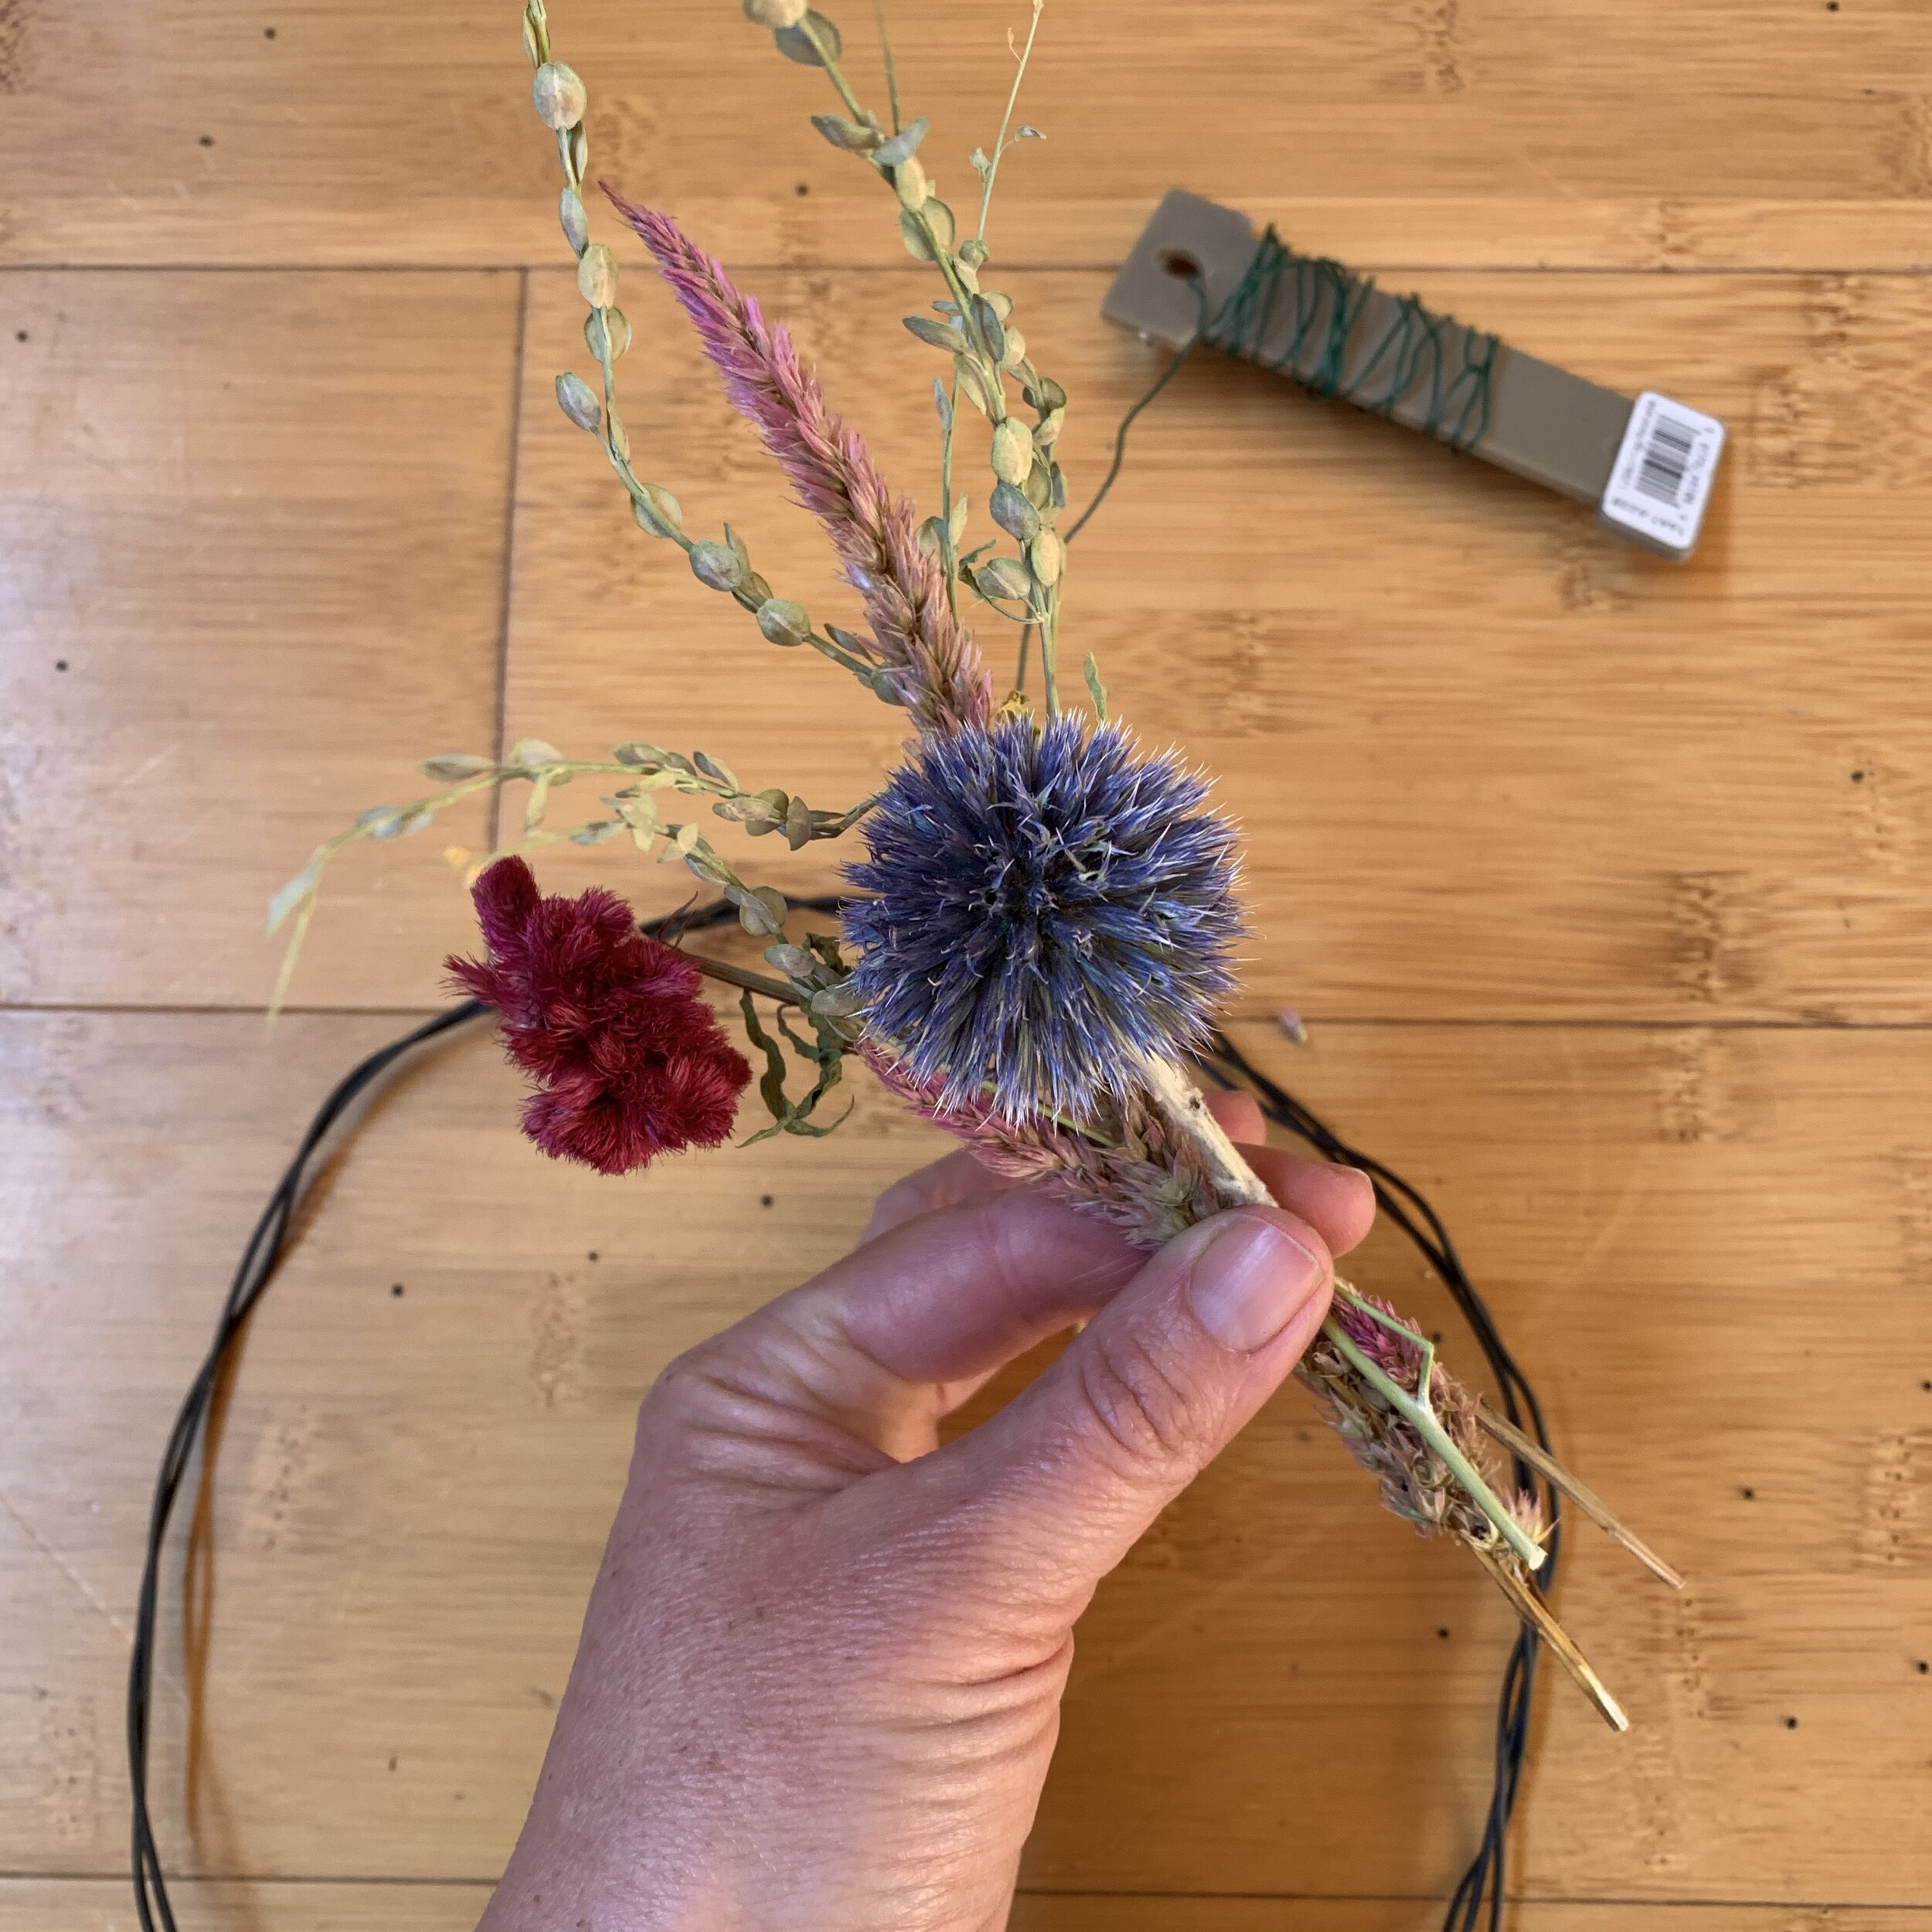
It’s best to work standing at a 6’ table or sitting on the floor with a large cleared area before you to hold prepared materials. I like to pick out 4-6 different kinds of plant species to work with for simple wreaths. The more varied materials you use, the more complex it is to evenly space all of the materials around the circle of your wreath base. With my selected species, I prepare them by removing any rubber bands from bunches, loosening the bunches, and by setting the piles out before me so that they are easily accessible. It can also be helpful to group small bunched combinations of species (e.g. 1 stem strawflower, 2 stems statice, 1 stem celosia) in advance of attaching them. If you choose this route of grouping your bunches in advance, prepare roughly 30+ bunches for a 12” wreath. You may need more or less of these bunches depending on the diameter of the wreath base that you’ve made. Group these bunches but do not wrap them with wire, rubber bands, or any other material yet. Make sure you have enough of the materials you want to use to get all the way around your wreath base. Until you get the hang of how much that is, it is helpful to start with a small wreath.
Step 3: Attach the floral wire to your wreath base and secure bunches
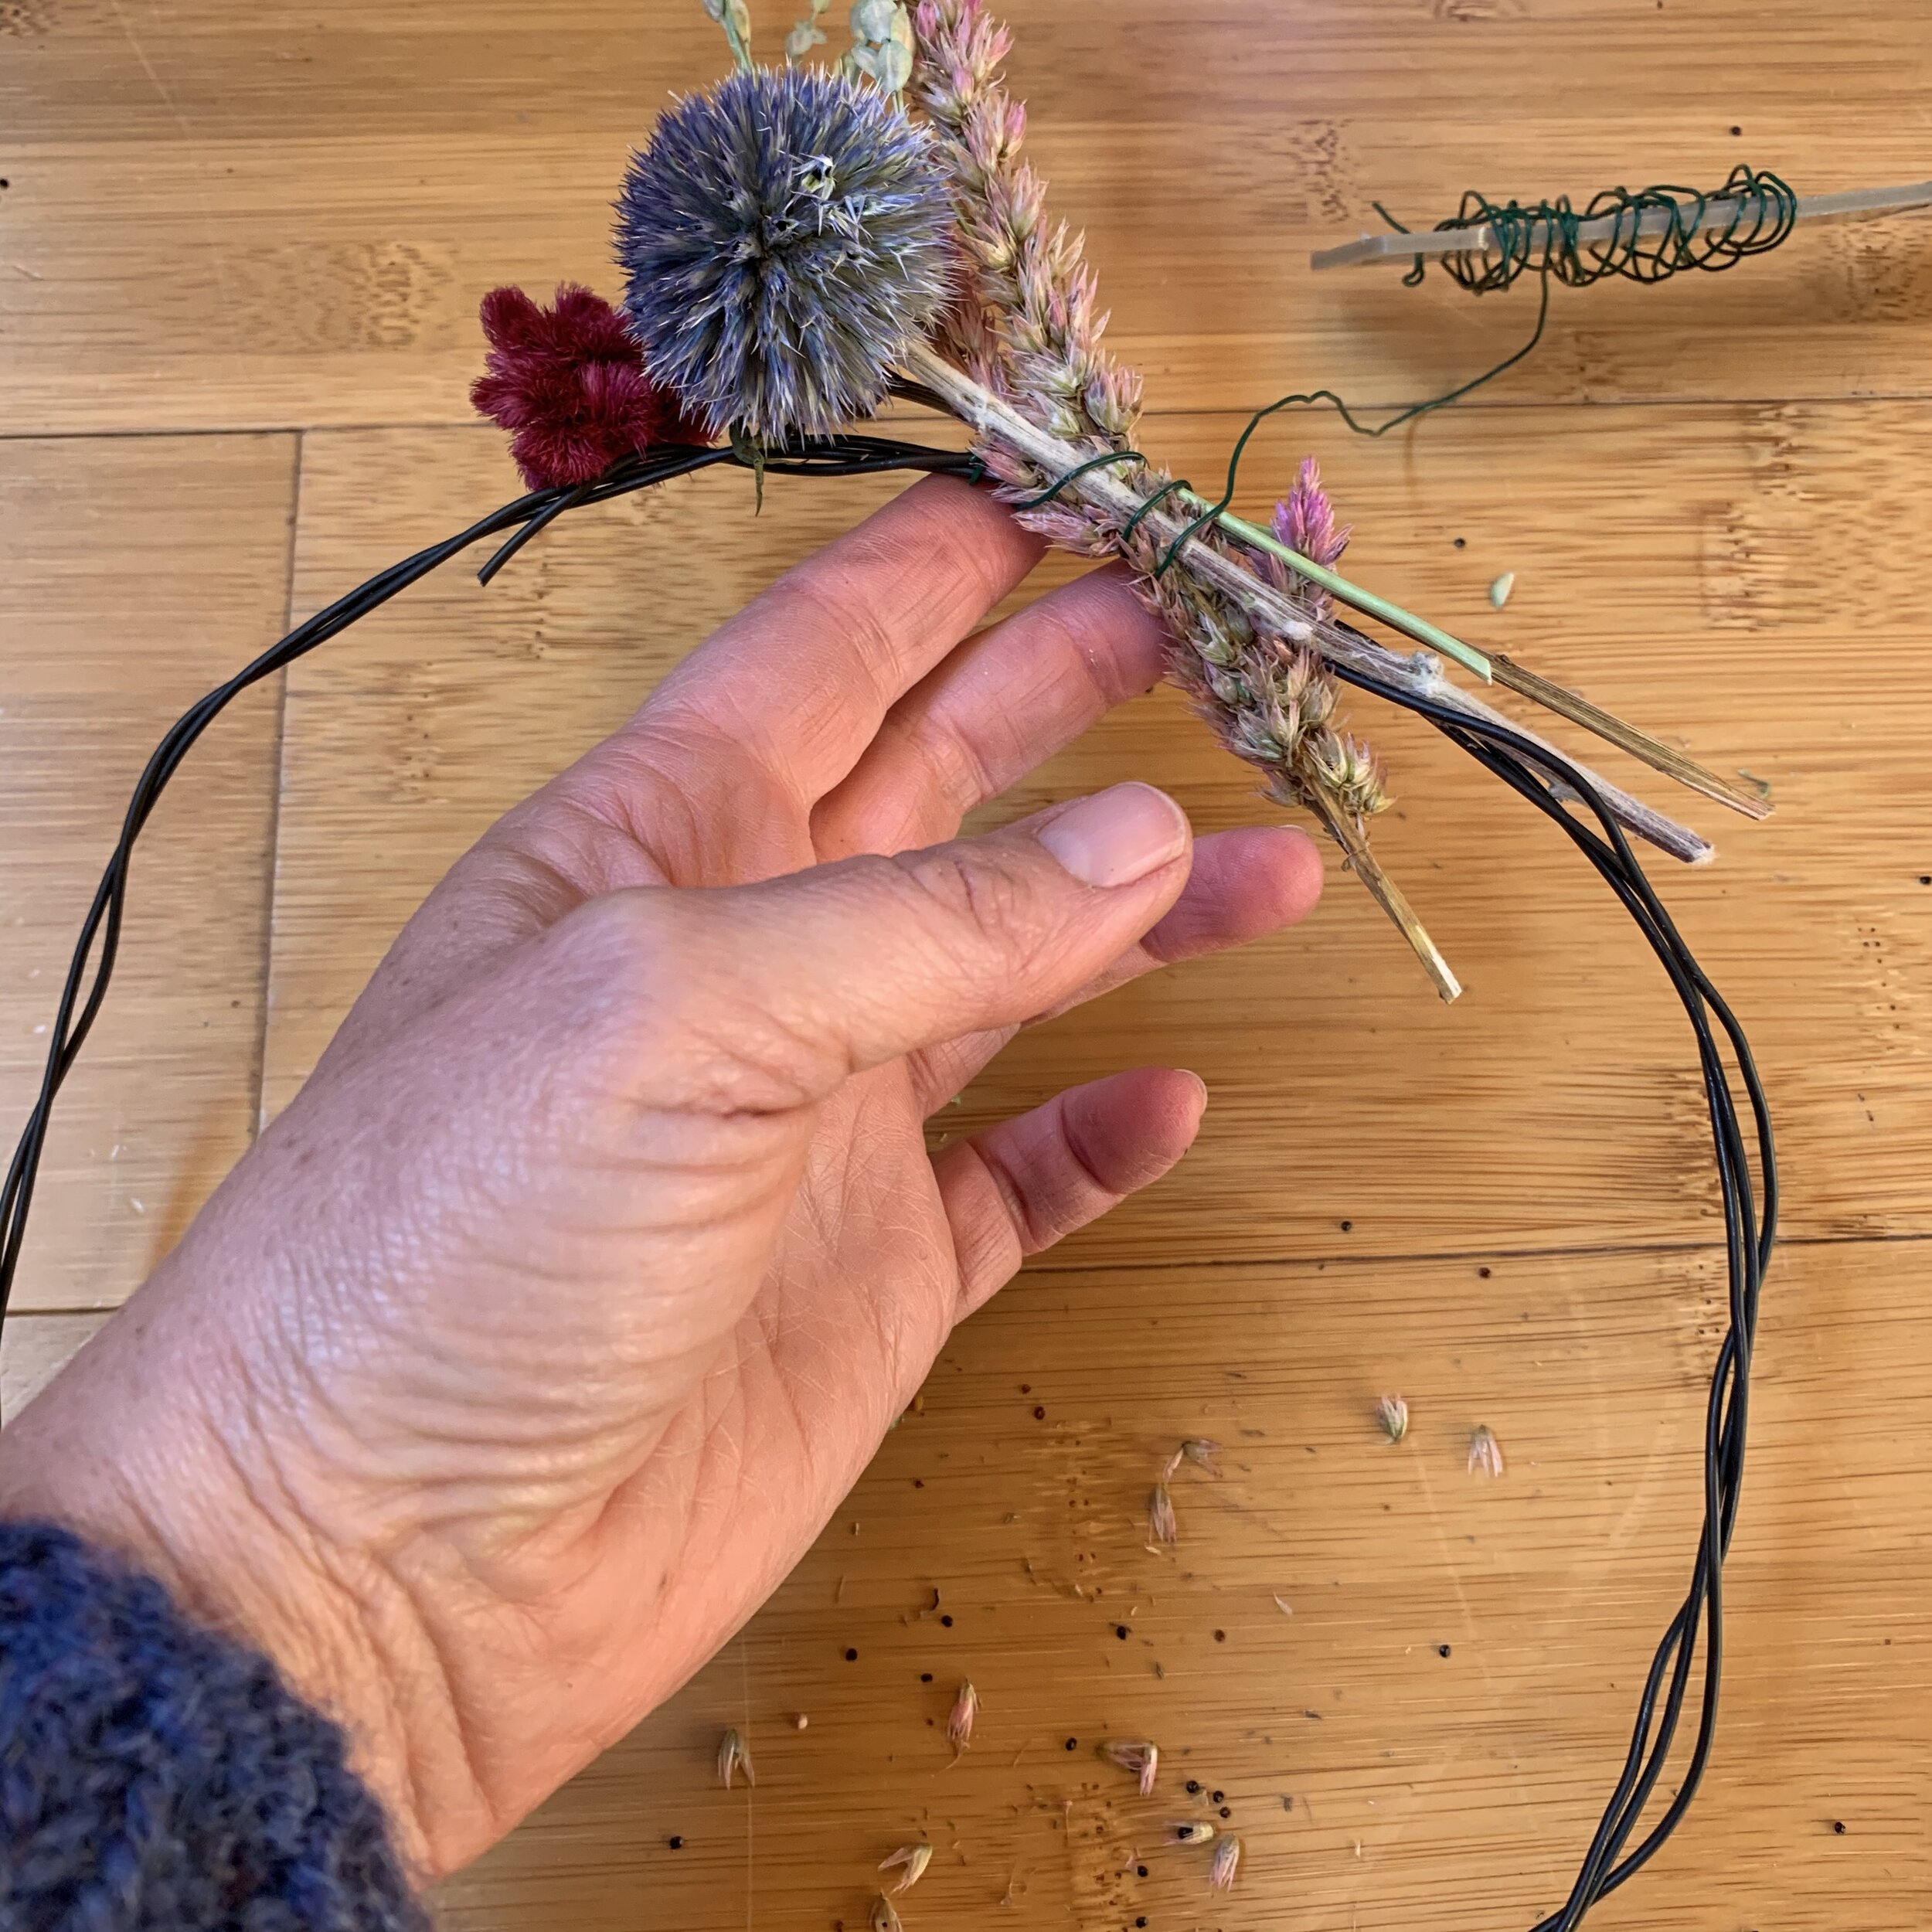
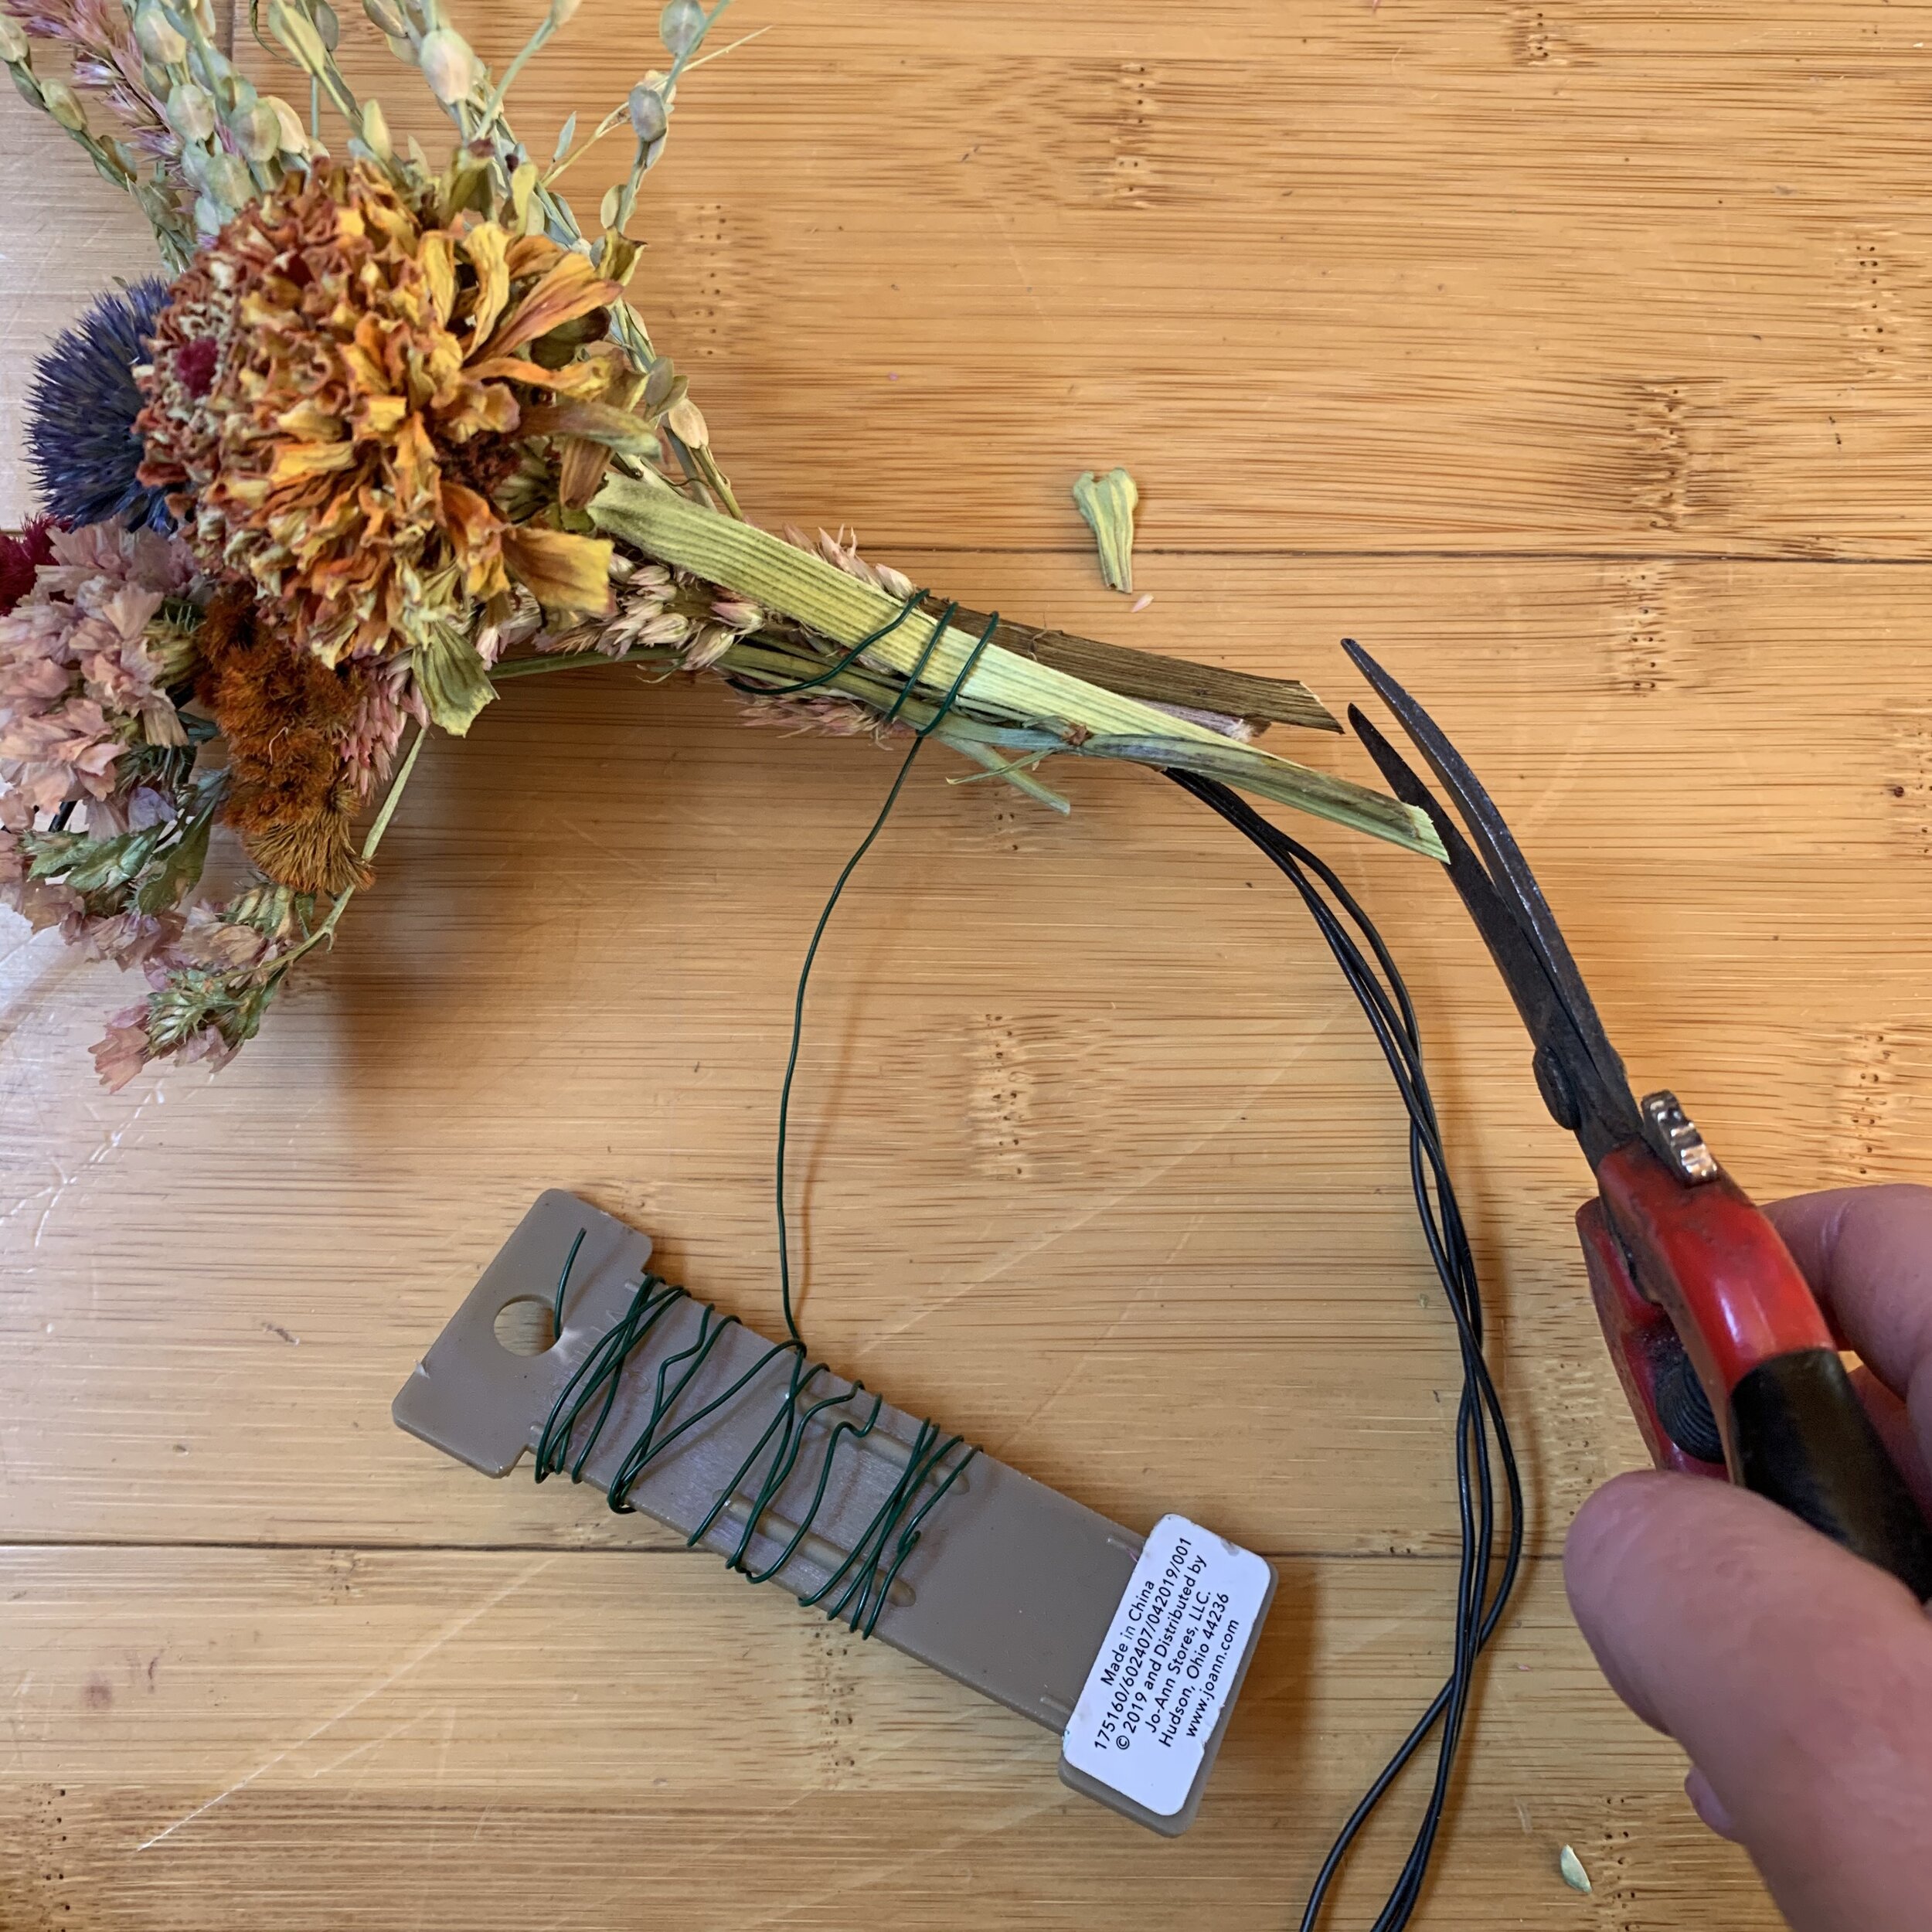
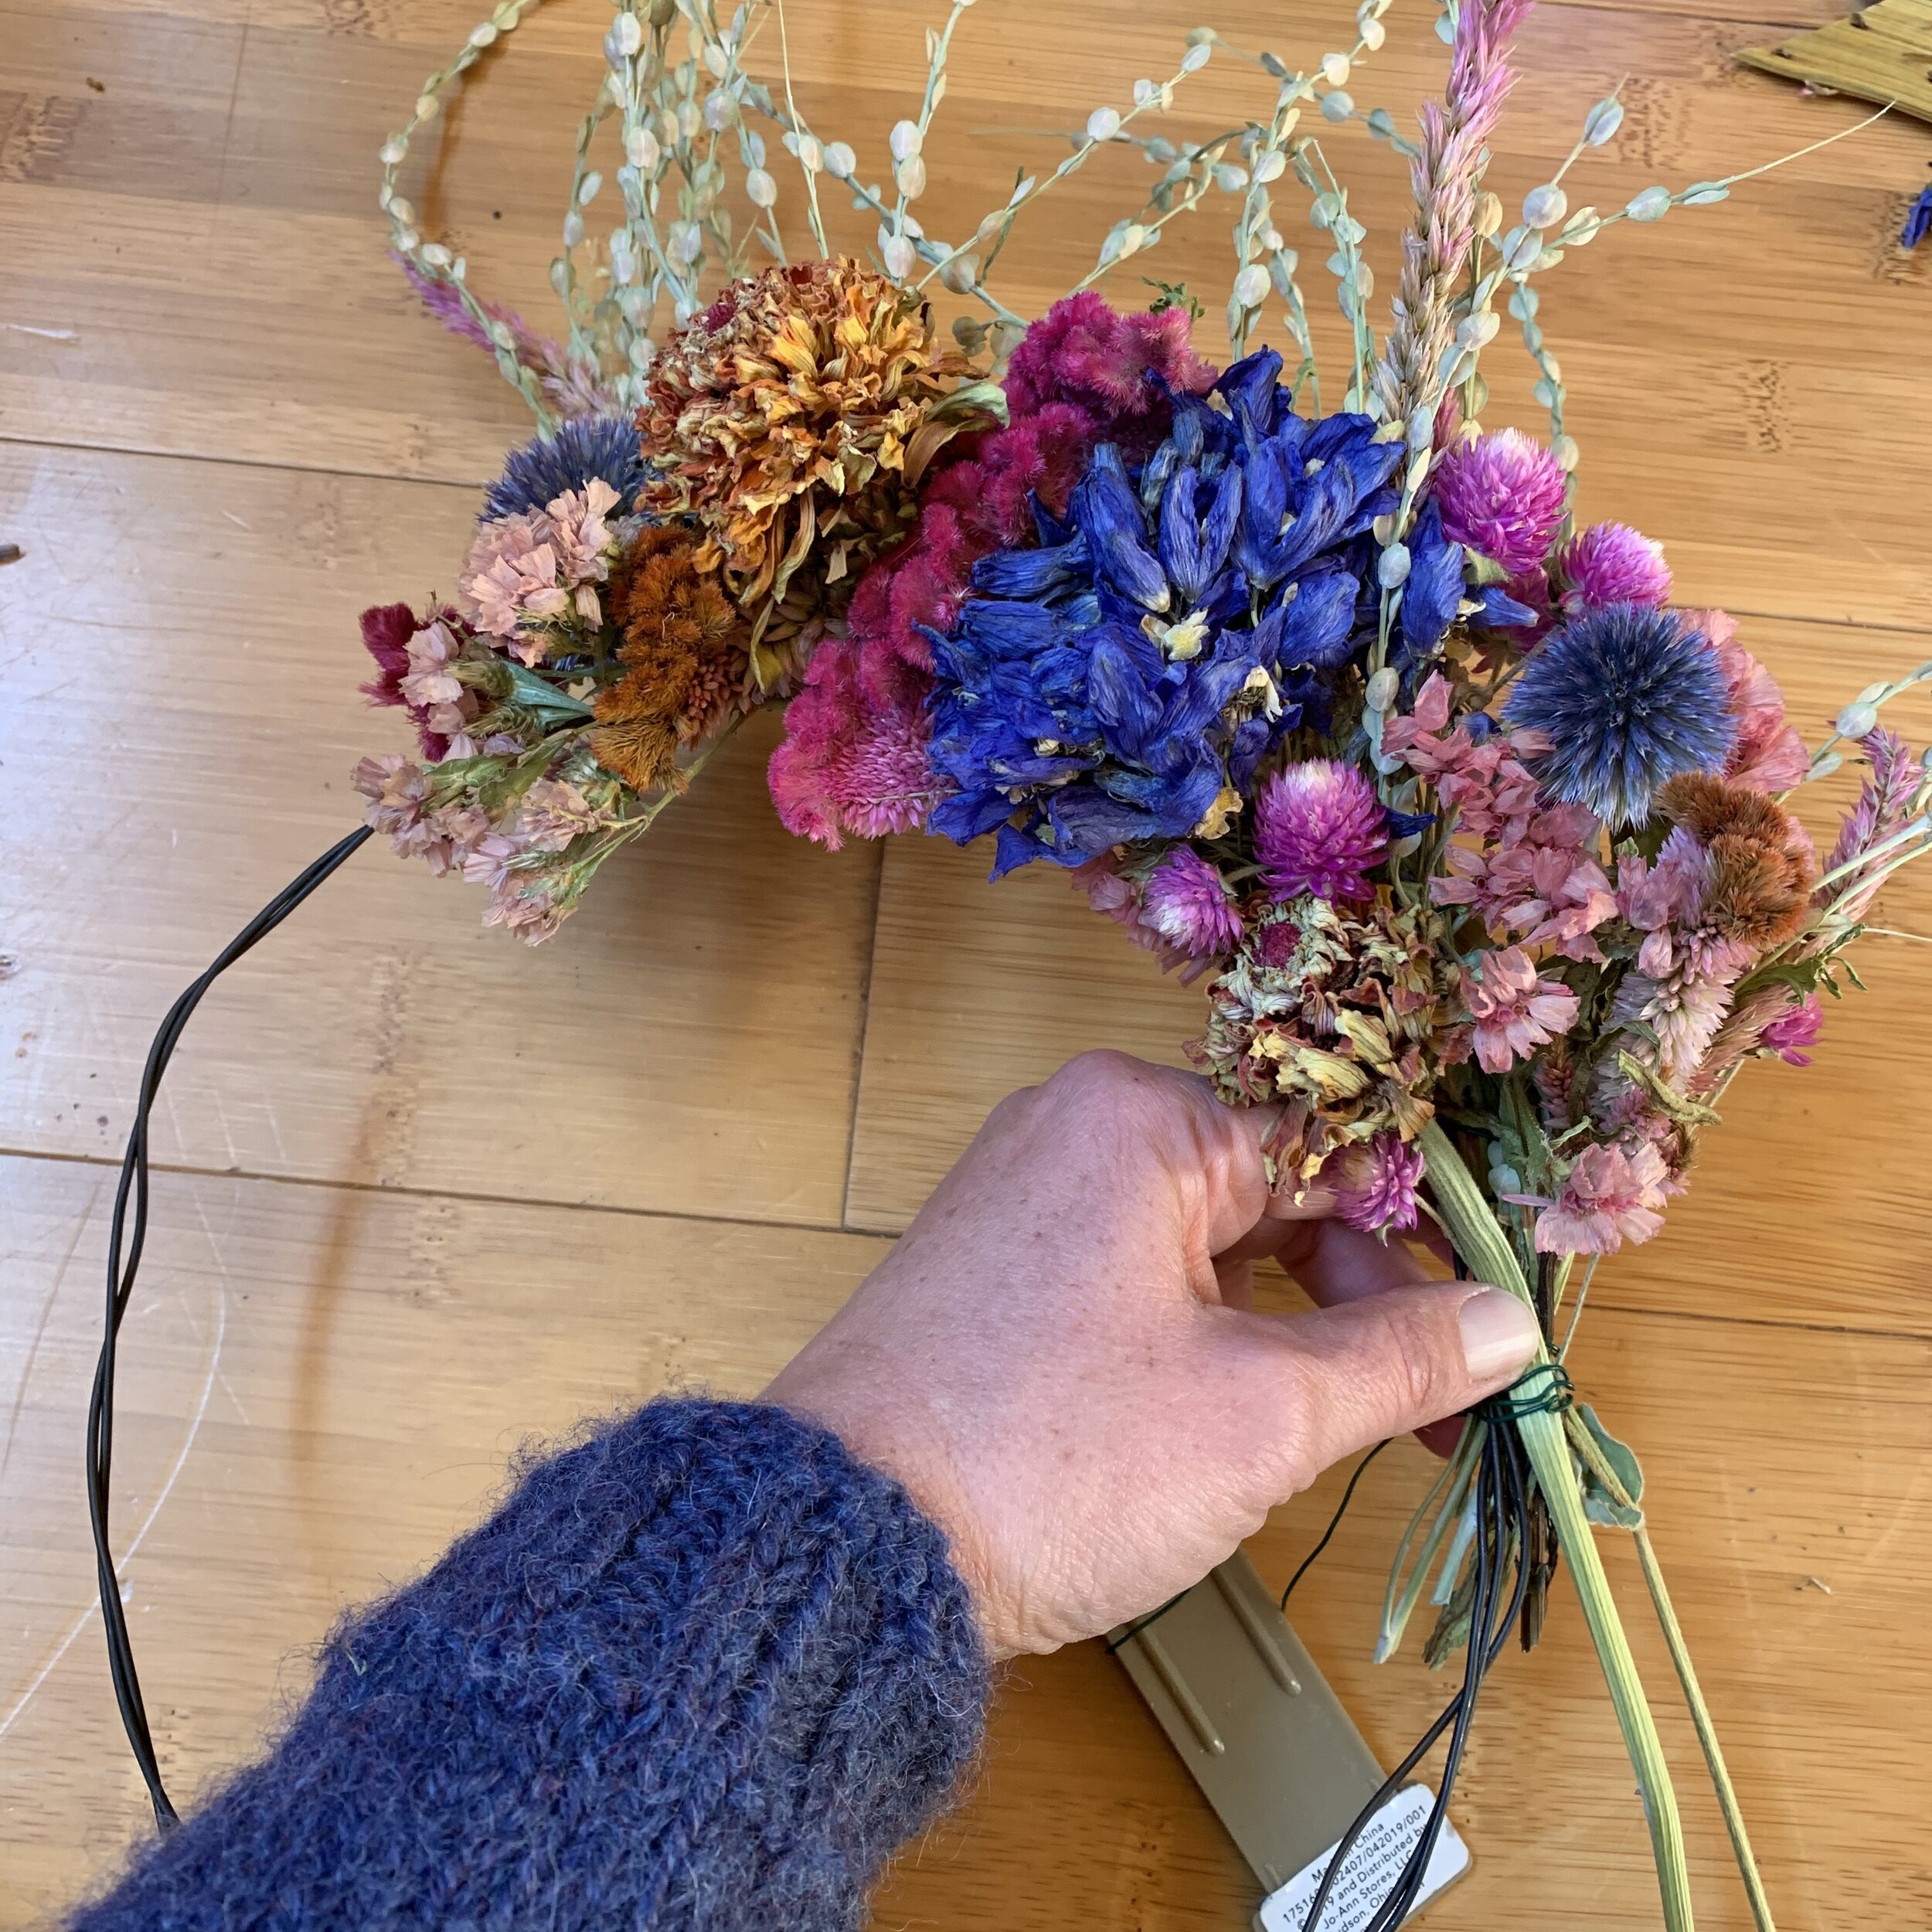
Wind your floral wire around your wreath base 3 times to tightly secure it from the beginning. You will lay your first bunch of plant materials on top of this wire to hide the wire. With your left hand, place and hold the bunch and wrap the floral wire securely around the stems 3 times. It should be secure enough that you no longer need to hold the flowers in place with your left hand. Now, choose the next bunch that you want to lay below the previous. You will place the materials of this next bunch over the wire that recently wrapped the previous bunch. Do not cute wire; you will be making a continuous wrap around the entire wreath. This is easier than cutting wire and having to secure the wire to your base anew. Also, make sure that you are using enough material to adequately cover any view of the wire base. Secure this second bunch with floral wire. You will slowly circle around the entire wreath base this way: lay materials below the previous bunch, wrap materials with floral wire, repeat.

Step 4: Closing the wreath
The trickiest part of wreath making is when you get to the end and are attempting to fill in the remaining space on the wreath base. A gentle touch is need to avoid breaking the materials from the initial bunches you laid on the base as you lay the final bunches. When there is only enough remaining space on the wreath base to require a final bunch, cut your floral wire and leave about 6” extra. Then, when you lay your final bunch of material, you can weave this wire through the stems to wrap your final bunch securely.
Step 5: Check for holes
It’s not ideal to back-track, but sometimes there are spaces around the circle of your wreath that look light or where there are big gaps. Fill gaps by gently weaving in your most pliable left-over materials. Make sure that your floral wire is properly securing these additional stems.

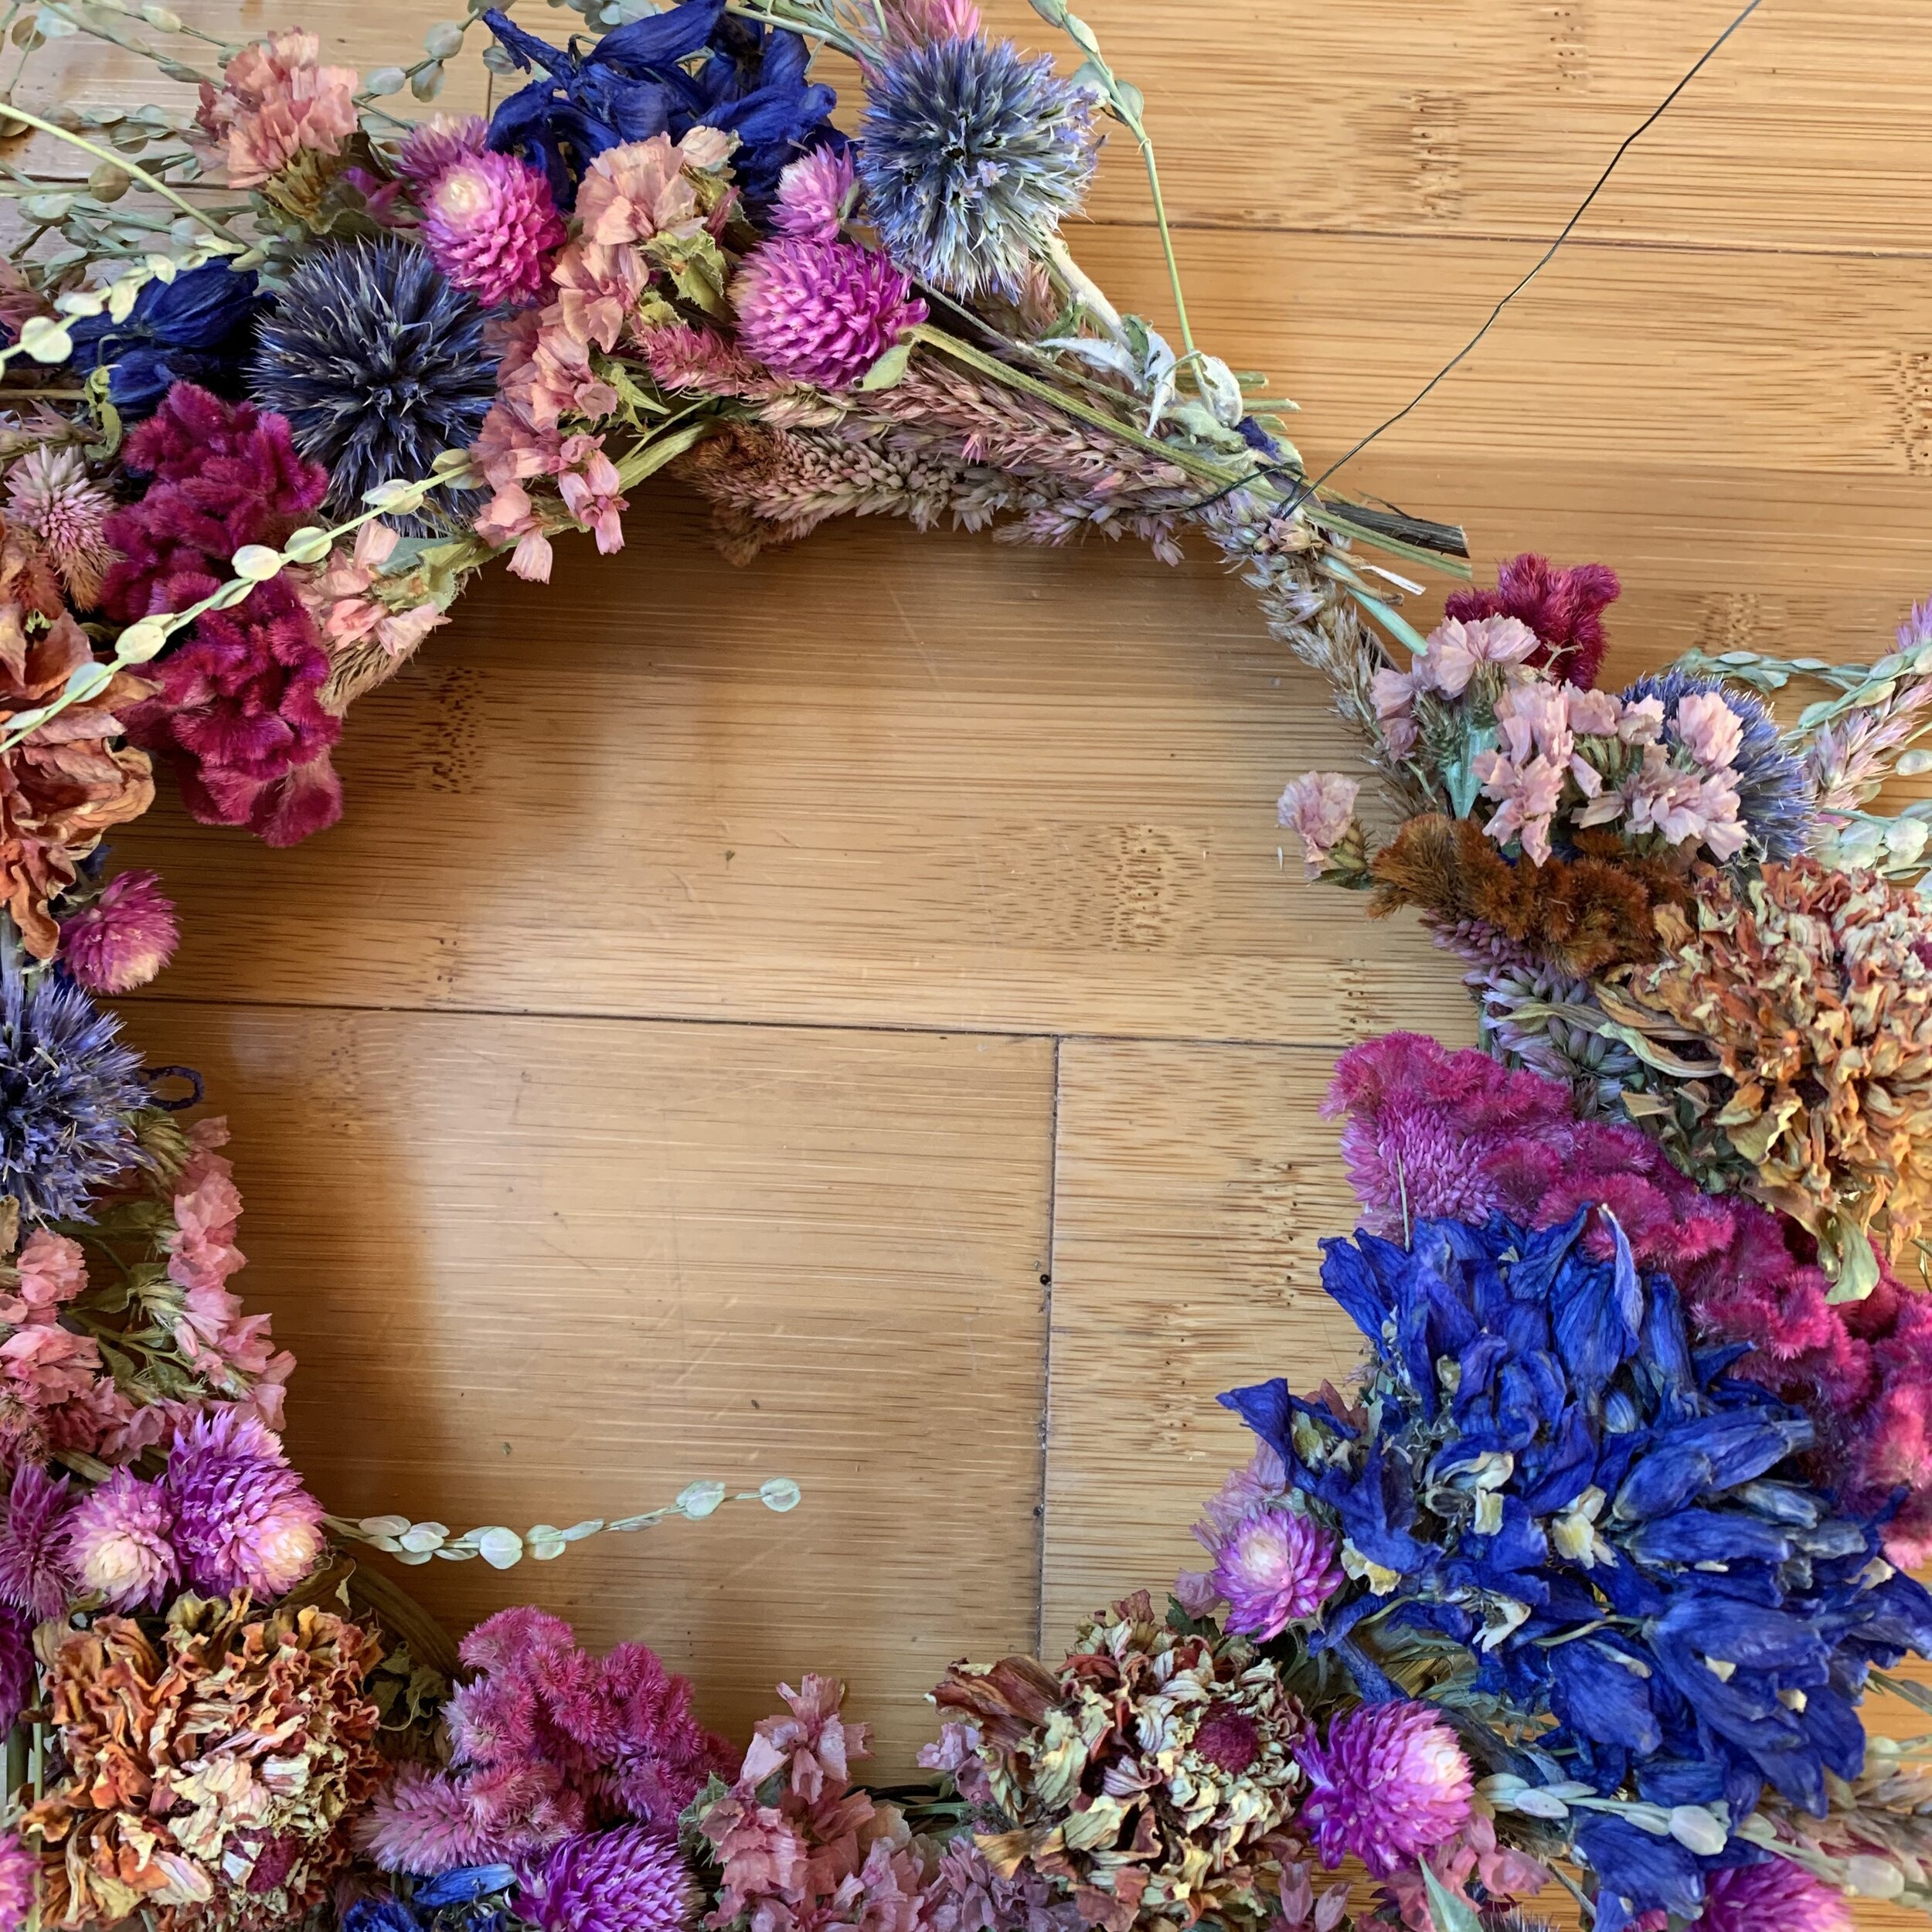
A finished wreath of cress, celosia, echinops, delphinium, globe amaranth, statice and zinnias
Step 6: Hang your wreath
Congratulations! Your wreath is complete. It can hang from the baling wire base on a nail or hook, but to make the hanging more secure, make a small semi-circle of floral wire. Attach this to the base securely, and hang your wreath from the hanger you made. Ta-daaaa!!!